
Finally, exams and assignments are more or less over, and I can work on some costume projects. Currently I am trying to use up my stash, so I decided to begin my Emilie Autumn 'Rat Queen' inspired costume. I know Emilie Autumn gets very mixed press, what with accusations of her glorifying mental illness (don't think I know enough about this subject to comment) or having over priced tickets/merchandise (shipping to Malta is always expensive, so I've never actually bought anything from her, though the Asylum book looks interesting), but I love the costumes she creates, as well as her music (especially the Enchant era, but a lot of the FLAG songs are good too)


The Rat Queen is probably as detailed as a Sakizou inspired costume, though much more ragged. I've always wanted to try my hand at something Sakizou-like, so this is an ideal project. I found fantastic cloth for the corset: pillowcases on sale for 1 Euro each. I also got a lot of scraps of cloth to turn into the bustle, and those cloth strips she had round her calves, and to make the rat tail.
Jewellery
.JPG)

Ears
.JPG)
The ears began as craft foam pieces, with a dart in the middle to make them more three dimensional.
.JPG)
See how much nicer they look than flat semi circles would look?
.JPG)
I applied several coats of PVA glue to stop the craft foam from being damaged.
.JPG)
Once the paint dried, I painted the ears grey.
.JPG)
I added embellishments using beads and gems. This photo doesn't show the extra beads that I added for more texture. The ears are now encrusted with silver beads.
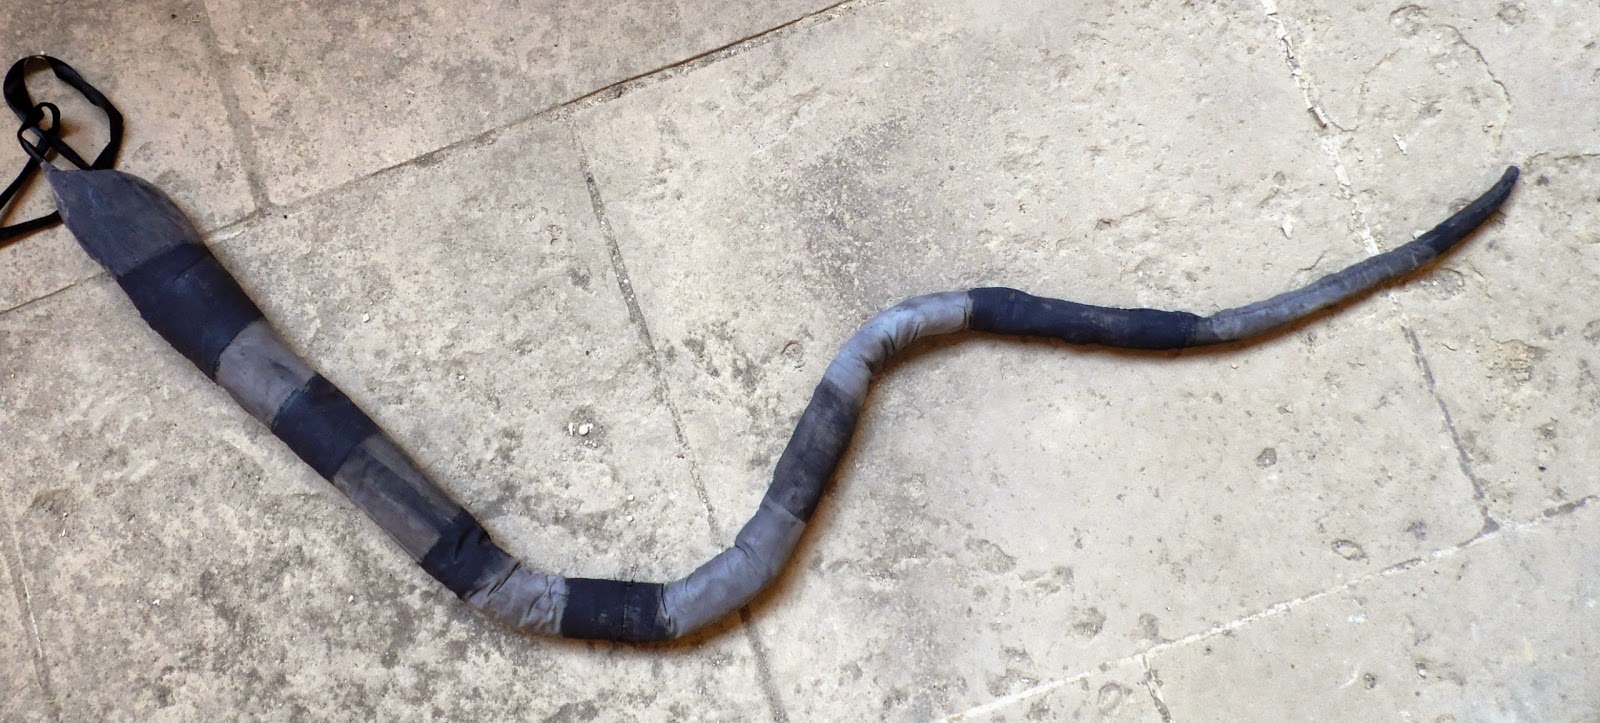
The tail was made by sewing lots of scraps together to make a big rectangle. The tail pattern is a long thin isosceles triangle, folded in half and stuffed. Stuffing the tail was difficult, because you can't really poke the stuffing to the end of the tail. I ended up hand-sewing the tail shut for 10cm, then adding stuffing, then sewing, then adding more stuffing, until the whole thing was stuffed. I didn't have Dacron or similar, so used scraps of satin and some wig fibres that I had (I massacred a blonde wig, and there were lumpy unusable wefts everywhere). Using watered down grey acrylic paint, I painted the tail light grey, then used a thicker paint mix to paint on the darker stripes. Lastly I added a ribbon to tie around my waist.
Bloomers
.JPG)
The bloomers are made from a single pillowcase, using this tutorial by Yiji on Deviantart. I didn't even make a pattern; I just traced around a pair of wide loose trousers to get the shape right. The stripes are pieces of lace, and I added some bows for decoration.
.JPG)
.JPG)
Corset

I can't work on this properly until I buy a busk. I don't know what length to buy, because one website suggested getting a busk 1 inch shorter than the length of the centre front. I asked Lucy Corsetry on tumblr, so I'll wait for a reply and see. I think I will use plastic bones to cut down on costs; I don't intend to use this for waist training, so I think plastic bones (zip ties) will do. The pattern is based on Katafalk's under bust corset drafting tutorial
Wig
This will be something of an experiment. I want to try dying a wig red for this costume. I have 2 wigs that might work; one is thin and a bit nasty, and the other is thicker. I will probably use the latter for the final wig, and the former for practise.
No comments:
Post a Comment