Reverse Bear Trap: Part 2
Second part of my guide to making a reverse bear trap prop.
Once all the glue has dried, the prop should be ready to paint. I recommend a few coats of black spray paint. I found this easier than trying to work a brush into all the nooks and crannies of the reverse bear trap.
Try to use a few thin coats rather than one thick coat. You want this to dry matte: I used too many thick coats and got shiny patchrd, though this didn't affect the final finish too much.
The next step was creating a rust texture. I used a very light coat of brown spray paint to start. You want a mottled appearance, so just apply a few puffs of the spray paint.
Next, time to dry brush. Dry brushing means using a dry paint brush and a tiny amount of paint, and applying that paint in a thin coat on your surface. THis allows the black surface to show from underneath, helping you achieve a rusty look. I used copper, silver, orange, raw umber, and yellow ochre acrylic paint to get a rusty colour.
The brightest parts of the trap should be the raised parts, like the edges of screws and bolts. The corners and creases will be the darkest. You should therefore apply the most paint to the raised surfaces.
You can also use acrylic paint as a kind of filler. If you have any gaps in the paper mache, use a little acrylic to fill the gap, then paint over it when it dries.
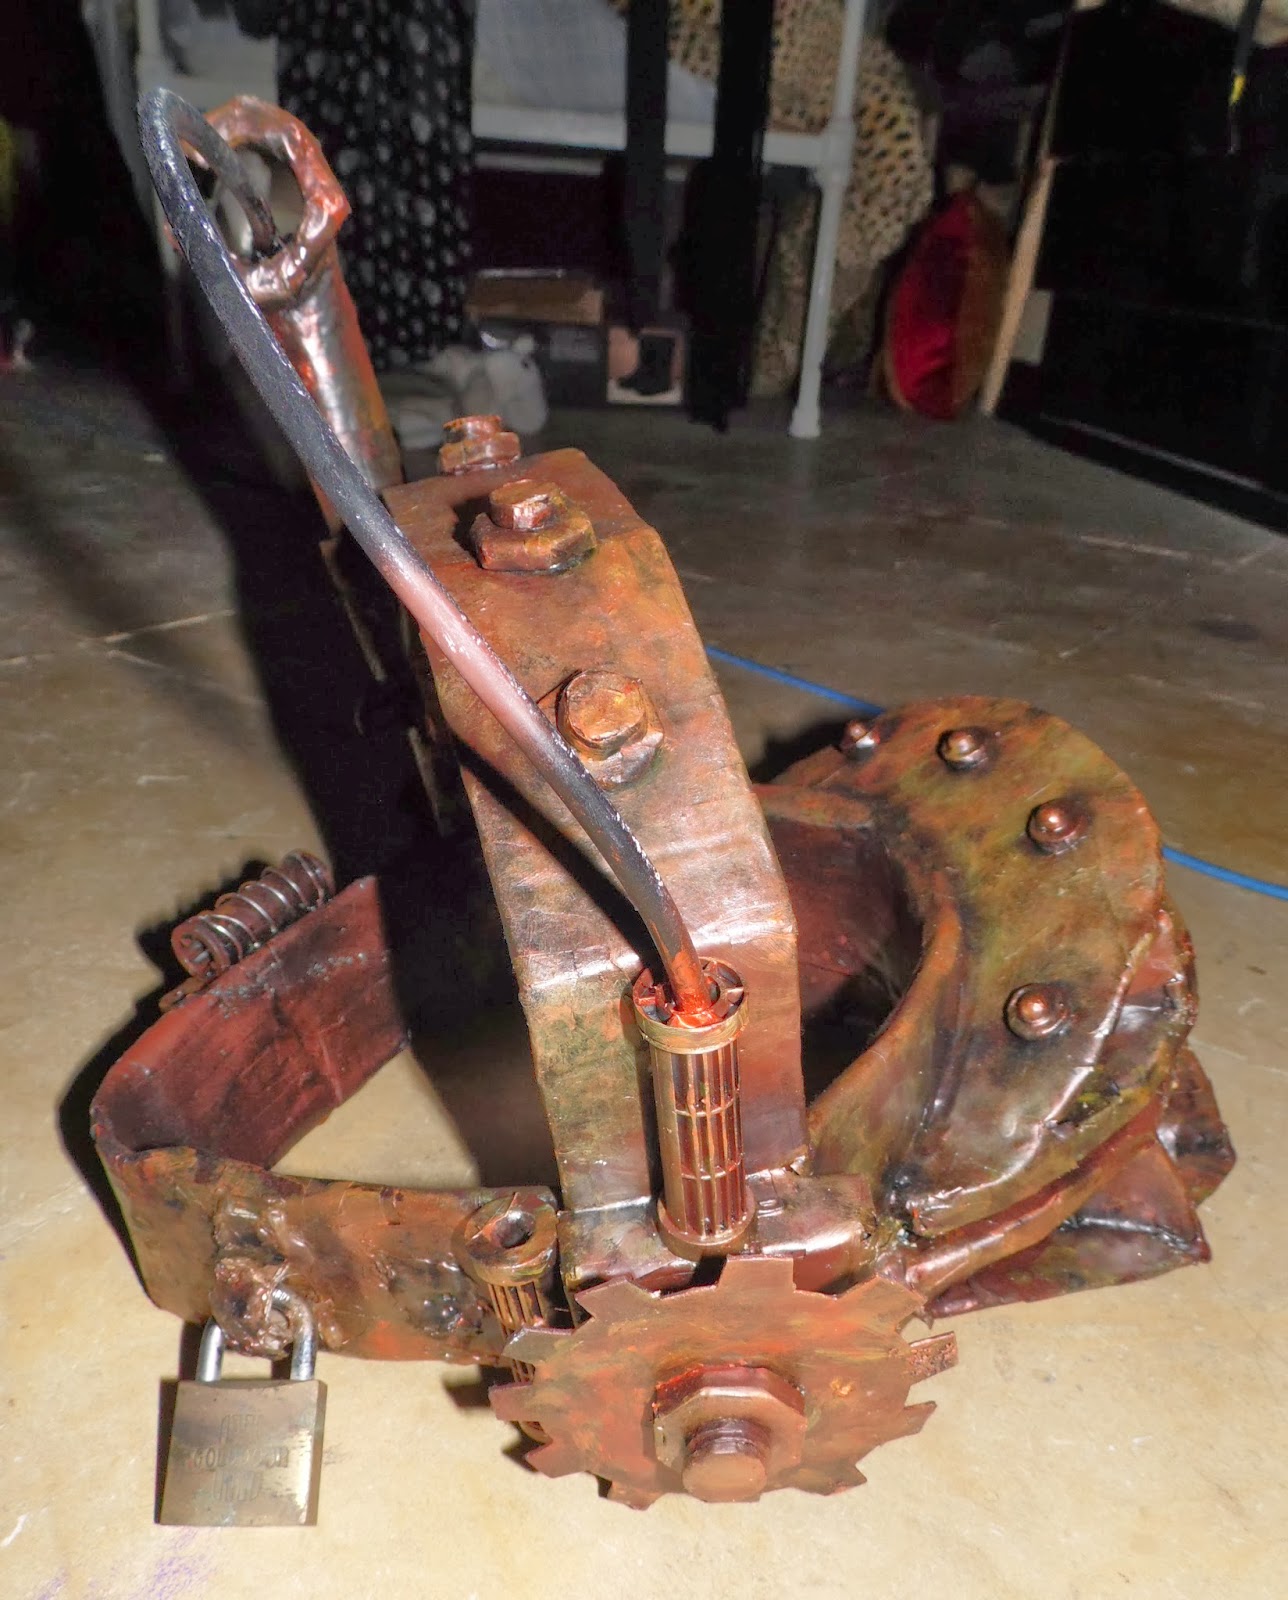
Here's the finished trap. I think it looks pretty good, and definitely more realistic than I thought it would.
Some details to remember: you need to add a little clock face to the back, to act as the timer.
And don't forget your padlock. Use a smaller one: it will be lighter, and less likely to rip the cardboard.


No comments:
Post a Comment