
This is a really brief tutorial for a corset I made for a client, based on Harley Quinn.

1. The first step is to draft a pattern. I used Kellax Production's tutorial, though Foundations Revealed has a very good tutorial; or you could just use a pre-existing pattern.
2 Trace your pattern on to your outside fabric (I used satin) and to your strength fabric. The strength fabric should be something with little to no stretch, like cotton twill or coutil. You should also have a lining material: I used some Batman print cotton drill :)
My method for tracing involves just drawing around the paper pattern pieces with tailor's chalk.


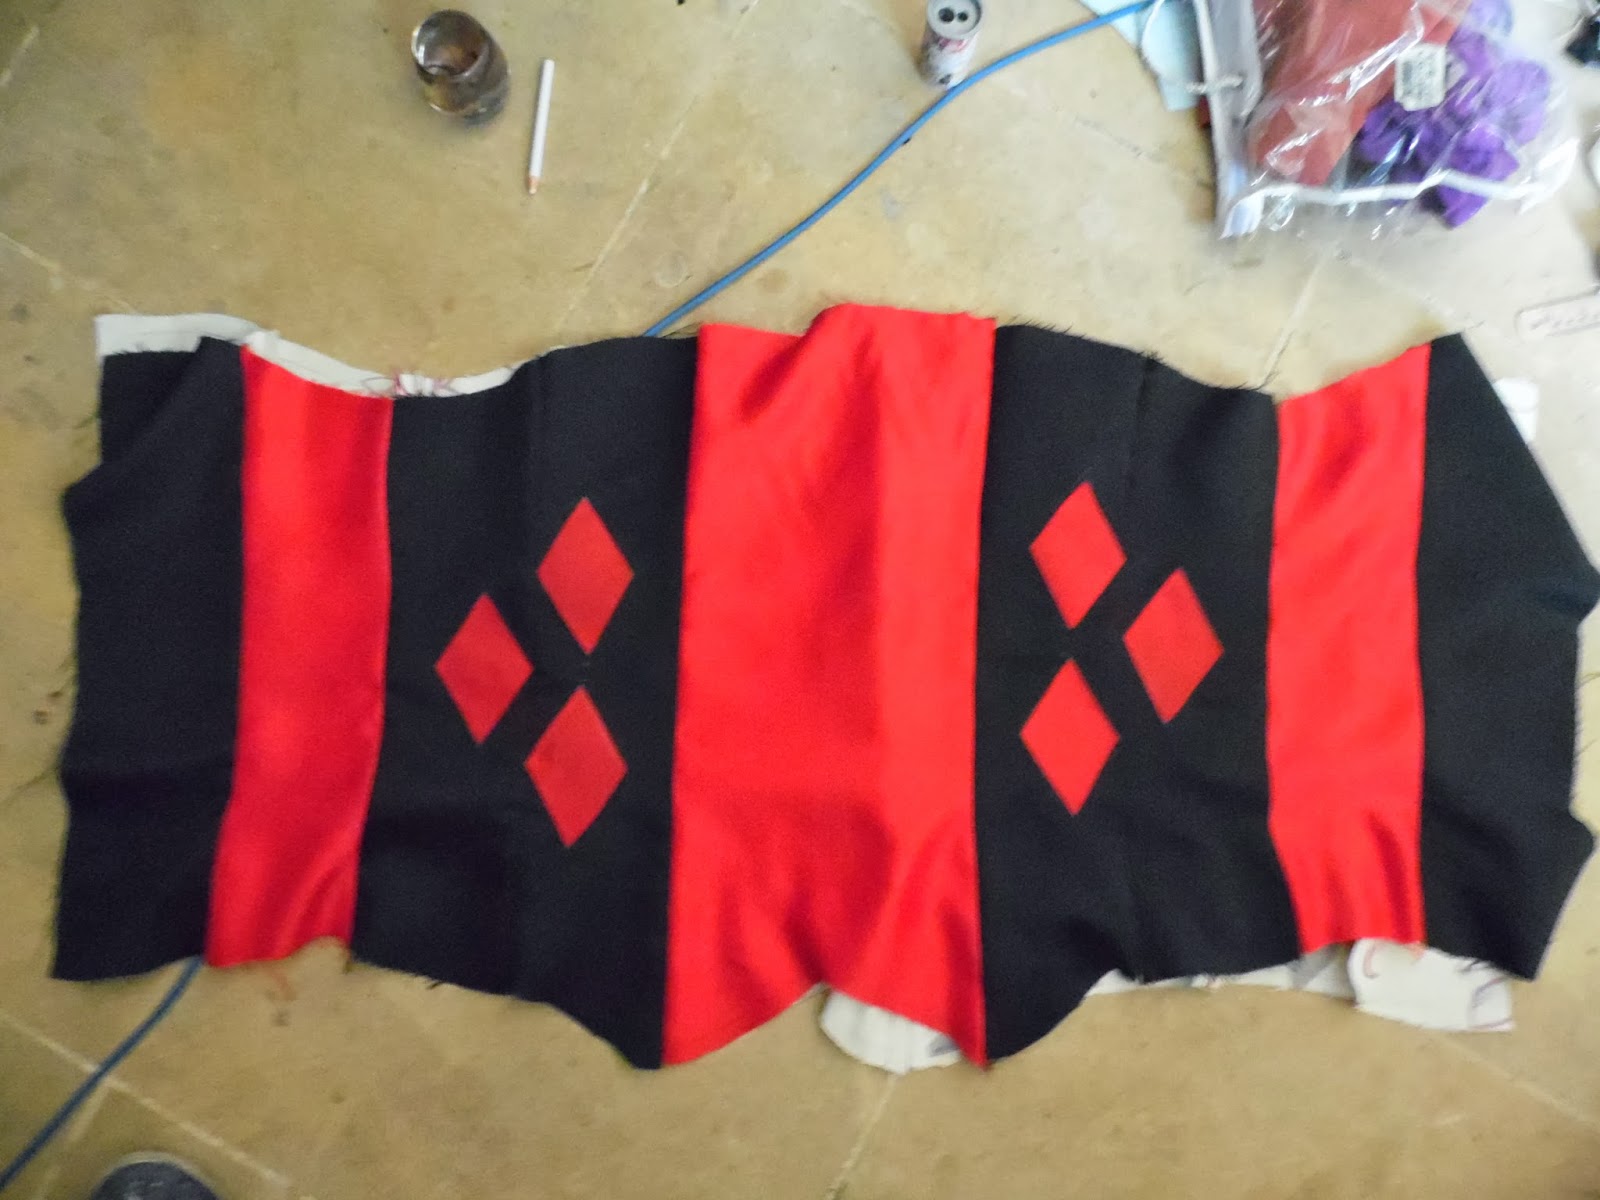
To attach the diamonds to the corset, use heat and bond or a similar product. You iron it on to the back of your diamonds (very carefully: you do not want it to stick to the iron - that would not be good), and then carefully peel off the paper backing. Once the paper backing is off, gently iron the diamonds to the front of the corset.
Be very careful when ironing satin, especially if its synthetic. I accidentally melted a piece of satin because I was stupid and used the high heat setting. Use low heat, or use a pressing cloth, or both
7. Satin stitch time. A satin stitch is a very narrow zig zag stitch.

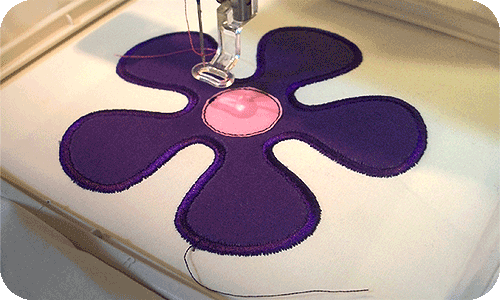
These two pictures show you what a satin stitch looks like. I prefer to add a satin stitch to anything I iron on with heat and bond. It seems more secure, and helps to prevent fraying. It also looks much neater
So, using red thread, sew around each diamond with a narrow zig zag stitch. Knot the ends of the thread to make everything secure, then cut off the excess thread.
8. Before you do anything else, you need to add bones to the corset. Corset bones are thin pieces of plastic or spring steel that give the corset shape. This corset is not designed for waist training, so I used plastic boning.

The bones rest in channels between your lining and strength layer.
I placed a length of boning at each seam. I pinned the lining and strength layer together (wrong sides together), and sewed a narrow channel along each seam.
9. Put the lining and outer material right sides together, and pin along the seam allowance. Then sew, using a straight stitch, along the STRAIGHT edges, where the laces will be, then turn it right side out.
10. Baste the lining and outer material together along the top and bottom edges of the corset.
11. Time to add bias tape.
 |
| http://www.coletterie.com/tutorials-tips-tricks/facing-or-detail-bias-binding |
The bias tape will hide the raw edge. To apply, open the tape up and face it right sides with the corset. Pin and sew the TOP FOLD of the bias tape. Carefully fold it over so that all raw edges are hidden, and sew it down. You can use a sewing machine, but some people prefer to sew it down by hand, using a blind hem stitch. This will be invisible from the outside.

When all the grommets are done, add laces. Since this is an overbust corset, you'll need about 5-8 metres of ribbon or lacing (a lot, I know, but it makes it easier to tighten the corset)
 And you're done :)
NB: I made two versions of this corset. The one pictured here used satin that had fusible interfacing ironed on to the back of the fabric. This makes the satin less slippery and easier to work with, but can make the cloth look a little like crumpled paper. I recommend using a sturdier material for your corset.
No comments:
Post a Comment