

This is probably not apparent from my normal blog posts, but I really like leopard print; specifically, the smaller, more subtle or natural looking variants. Seriously, I have a leopard print duvet cover and blanket.
I bought a length of leopard print material (knit, maybe velour) from Loughborough market last February, and brought it home, squished in my suitcase with some charity shop bargains. A few days ago, I was in a fabric shop looking at some leopard print linen, pondering making a halter dress from it, but then i remembered the leopard print I already had at home. After a bit of brainstorming, I figured out what I wanted to make:

I had a Burdastyle pattern that was ideal and I was inspired by the boldness of Smarmy Clothes's designs.
I really wanted to recycle scraps for this project. i had leatherette scraps from another project. They weren't quite big enough for the strap portion of the pattern, so I split the pattern into sections so that it could fit on the leatherette.

You can see here where I made all these little marks to help me match the pieces correctly.

Here's where the top front piece meets the back strap.

All the pleather pieces. The long strip of pleather was taken from a charity shop find. It was a strange dress, which looked like a plaid shirt sewn to a leather skirt. I removed the leather skirt and made it into a separate skirt, but still had the waistband of the dress, which I wanted to use for the leopard dress.

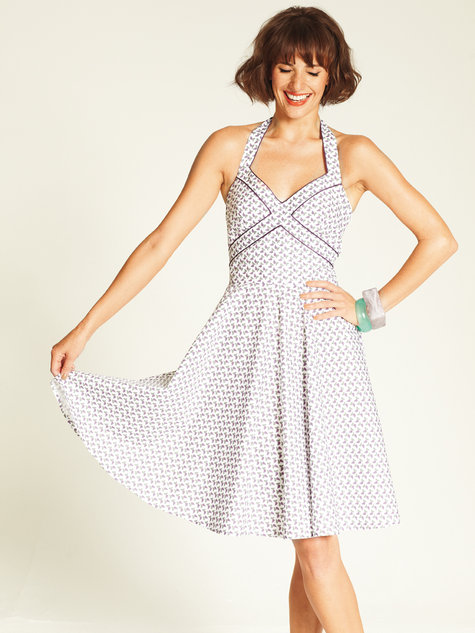
Here's the fabric. I think it looks gorgeous :)

I had a limited amount of material, so had to place the pattern pieces carefully to make sure that I had enough material left for the skirt. I wanted a large skirt, either gathered or a circle skirt.

Here are the pieces of the bodice all together. The leopard pieces are interfacing and basted to a lining material.

And here's what they look like sewn together. i used my serger, but once I collect my sewing machine I will reinforce the seams with a straight stitch.

The back of the dress was a bit loose, so I added elastic. Burdastyle bodices tend to be a little loose on me, and elastic was the simplest solution.

You can see here that it's a little tighter.

Next step was adding the waistband. It was longer than necessary, so I had room for error. It had a seam on it, which I matched with one side seam. Next I basted the pieces together, and overlocked the seam.

The bodice pieces, all sewn together, though the edges still need hemming and top-stitching.

I really wanted to make a circular skirt, and actually used By Hand London's Circle Skirt Calculator to check how much I would need. I didn't have quite enough fabric for a circular skirt, even a half or quarter circle skirt. I decided to instead make a gathered skirt, perhaps adding horsehair braid to the hem for additional volume (maybe). So I cut two large rectangles from the remaining material.

I pinned the rectangles to the bodice to get an idea of how it would look. So far, so good.
And then I got a bit lazy when taking photos. I added pockets to the skirt and gathered it; I recommend this video to show you how to do it, but leave one seam open so that you can add the zip later.
Next I added an invisible zip in the side seam.
I hemmed the skirt using a double needle, since this material stretches.


No comments:
Post a Comment