Showing posts with label bodice. Show all posts

Friday, February 27, 2015

Sakizo's Juliet: Part 3: Bodice and Beading

So, the bodice. Oh boy, the bodice. Just to remind you what it looks like . . . 
Yeah, it's super detailed, with beads everywhere.
The first step was making the stripes. I first made the bodice out of interfaced stretch velvet. The interfacing stops the velvet from stretching. I measured out where I wanted the stripes, then interfaced some gold satin. I then sewed the gold strips to the wrong side of the velvet. This is a bit live reverse applique: you sew it to the wrong side, then trim off the fabric on the other side, revealing your applique.


You can see how I trimmed off the excess velvet to reveal the gold stripes. I also added two extra stripes on the sides.

 Already looks pretty neat. Using this method was a lot easier than sewing gold stripes on top. I actually tried that and the stripes looked very crumpled and ugly. This technique looks much smoother,
Next step was adding embellishments. I basted on some lace to the neckline. When I add the lining the lace will look a lot better. I also began adding the pearls. I actually cheated a bit and order pearl strings, which have a continuous length of beads. This saves a lot of time and effort, since I don't like beading much (all the beading I did with my flapper dress!)
 I also began experimenting with the oval decorations on the bodice. I make these by cutting up duck-shaped sequins (what exactly would you need duck-shaped sequins for? I am genuinely curious). I then glued thin satin on top of each oval, coated it with PVa, and painted them white.
 While the white ovals were drying, I added the ivory pearls. Next I sewed on the gold waistband. It's actually a bit too narrow. I also stitched on the gold flower on the shoulders.

 Time to sew on the ovals. The pattern was drawn with a black permanent marker. I also began decorating the waistband with gold flowers, and adding white pearl strings.

 That took a while. Once that was done, i started making the little flowers for the waistband. The petals are cut from polyester material, the edges scorched with a candle, then stuck together. 
 I sewed on each little flower, then sewed a pearl bead on top.
 Result! I also stuck rhinestones on to the white ovals and gold flowers (shoulders)

Next i added the little fabric pieces on the waistline. I sort of botched the proportions of the bodice, so the bodice now looks a bit too long. Oh well. First step was ironing strips of interfacing on to the velvet, then making piping.
Here's all the bias tape I made. I actually made too much. to make piping, I folded the tape in half over a length of wool, and sewed it, making sure to sew close to the edge of the wool. Then I tacked the piping on to the velvet, and serged to raw gold edge. I folded under the serged edges and topstitched to keep everything in place.

I then cut 10cm pieces, tacked them to the bodice, and sewed them on, before turning everything to the right side.

Update 28/3/2015
So I've been working sporadically on this bodice. 
I added a lining to the bodice to hide all the interfacing and bits of thread. I was going to line the whole dress but it didn't work out. To line this dress, first I had to attach the skirt to the bodice and sew in an invisible zip. Then I placed the lining and bodice right sides together and sewed around the neckline, clipped the curves, under-stitched the neckline, then turned it inside out. It looked very neat. I hand sewed the lining to the zip, then hand sewed the lining closed at the bottom of the bodice. 
 The fit was good, but the lace at the neck looked too small, and it was missing the white puffy material along the neckline. I bought a metre of lace, painted the edge gold, and sewed it over the lace on the neckline. To create the white puff of material, I sewed a tube of white fabric, and turned in right side out. I closed one end shut and sewed it to one side of the dress, then began to stuff it (I used scraps of organza, but proper stuffing material might be a better choice). I cut the material to size and sewed it down at the other side. Next I took a length of pearl chain and sewed it down on one side, then began wrapping in round the white puff, tacking it down at the top and bottom. 
I will talk about the sleeves and skirt in a separate post, as this one is already really long.

Friday, October 24, 2014

Gothic Satin and Velvet Skirt and Bustier

I always wanted to try my hand at a gothic dress. I was partly inspired by doxiequeen1's gothic dress: http://doxiequeen1.wordpress.com/2014/10/09/making-a-glittery-gothic-dress-part-two/ , and I also had some nice fabric I wanted to use. I bought a satin dress from 50c in a charity shop. It had a gorgeous pattern, something like a brocade material would have. I looked on the internet for inspiration, and decided to make a satin skirt, and a satin and velvet bustier. Originally this was going to be a one piece dress, but I thought two pieces would be more versatile. Unfortunately the bodice doesn't fit me very well: it's just a bit too loose; so I'm selling the outfit on etsy: https://www.etsy.com/listing/208400395/black-goth-skirt-and-corset-top?ref=shop_home_active_2 
Here are all the bodice pieces. I used two layers: fashion fabric, and twill as a strength layer. Corset type tops need a strength layer due to the stress of being laced shut. Without the strength layer they can rip. 

The first step was assembling the bodice. This is based on a Burdastyle pattern. I pinned everything together carefully and sewed it. I then added boning channels using scraps of cloth: you can see the channels in the picture on the right.

Once the strength layer was ready, I started on the fashion layer. The central panel is satin with interfacing, and the rest is velvet. I was very lucky because I already had all the fabric that I needed. I had a piece of black velvet left over from Harley Quinn, and it was just big enough for this bodice.
My cat Pearl (it's the name he came with; I wanted to call him Othello but he wasn't interested) came in to help. I try to keep him out of the room when I'm sewing in case he swallows thread or gets pricked by a needle. It's surprisingly common for cats to swallow needles, thread or both.
 The final stage was adding grommets to the back. I use grommet pliers to set them. they're not as good quality as hammered grommets, but they do look nice.
The skirt was a little tricky to make. I didn't have very much fabric to work with. I could have been lazy and made a gathered skirt, but I knew that a circle skirt would have a nice drape. I found this amazing website that helps you calculate the radius of your circle skirt and how much fabric you'll need: http://byhandlondon.com/pages/circle-skirt-app . I drafted a half circle skirt in two pieces. I made the front shorter than the back, added some side gores for volume, and then added the curve in the front.
The rest of the process was quite boring. I sewed everything together and also sewed bias tape along the bottom, then hemmed it. I made a very simple gathered skirt to act as a lining. Finally I added a waistband and zip.  


Sunday, September 7, 2014

Slopers, or, Why you should make a mock up

I'm preparing another costume (I know - too many. but there's no such thing as too much cosplay!). The bodice is a strange shape: not quite a princess seam; so I scrapped my original plans and drafted a sloper. I am so glad that I made a mockup, because this sloper is abysmal. It gapes weirdly at the armpit, and I don't know how to fix it. Oh well, back the the drawing board.

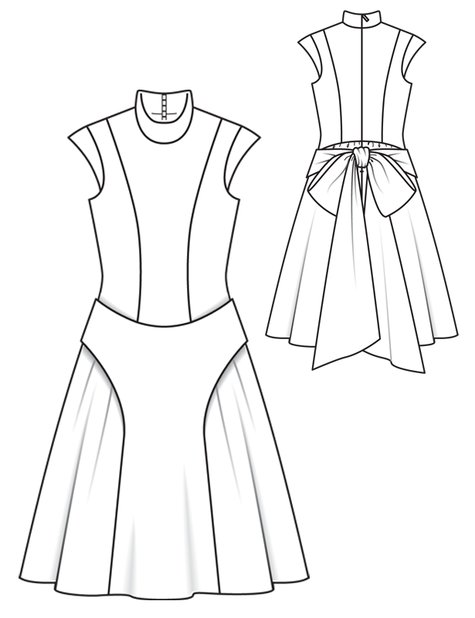
My next idea is to take the original bodice pattern that I had in mind, draft out the princess seam (Dawn Pages has a great tutorial for that http://www.reddawn.net/costume/princess.htm) and draw in my own seam lines. It would make the front of the dress much more accurate. I'm thinking of altering this pattern (http://www.burdastyle.com/pattern_store/patterns/high-collar-short-wedding-dress-32011) All I need to do is to make that centre piece a little bit narrower.


Sunday, August 10, 2014

Retro Catwoman Part 2: Bustier and Accessories

The Catwoman costume is done, and in a very short amount of time; maybe a weekend tops?

I used a Burdastyle pattern for the bustier. I should have made a mockup, because it is a little large for me. Also, when the pattern instruction tell you to cut the boning shorter, you should do that, because the bones interfered with the top stitching. And maybe hot pink lining wasn't the best idea. Despite this, I'm very pleased with my first cupped bustier.
 It's not a Catwoman costume without some kind of cat ears. I used pleather scraps to make these ears, then glued them on to a head band. 
To complete the costume, I bought some goggles from ebay seller asvpshop. 
http://www.ebay.co.uk/itm/251052896650?var=550261164716&ssPageName=STRK:MEWNX:IT&_trksid=p3984.m1439.l2649
I order a pair with red lenses. I was actually surprised that they came with two pairs of lenses: one black, one red. The lenses were a bit dirty; I think I need to scrub them with glasses-cleaning spray or similar.
 They fit very well, and are great for this costume,though I think I will wear them up on my head because seeing everything through a red haze is quite strange.


Tuesday, June 18, 2013

Yvaine Bodice

 This is the bodice for my Yvaine costume. The front panel is some kind a silky material. THe velvet is actually stretch velvet heat-and-bonded to chintz. The sleeves are organza. I drafted the bodice by pinning pieces of cloth on the dress form until I got the desired shape.
I got some eyelets from ebay and added them. Unfortunately a lot of them split, but minimally. The dress form is a little large, so the lace don't close fully. 

Wednesday, June 12, 2013

Yvaine: Bodice


 Latest costume plans: Yvaine from Stardust. I haven't actually finished Wonder Woman, but the applique is giving me grief, so I'm taking a quick break to work on Yvaine's blue dress.
 This dress is relatively simple, because I already have a dress that would work for the skirt. Currently I have been working on the bodice.

The first step was making the pattern. I did this by pinning an old fabric bodice sloper around by dress form, and pinning until I got the desire fit and shape. Then I marked the lines with a fabric pencil, and cut out the pattern, then copied it on to paper.
 Tracing and cutting the fabric came next. The velvet material I used is actually stretch velvet that was heat-and-bonded to a non-stretch fabric. This is a good trick to use if you can't afford real velvet, or have the perfect material but it's too stretchy.
 The light blue material is some kind of silky material found in the furnishing section. The good thing about furnishing fabric is that it comes in wide lengths: I got 50cm x 300cm for under 10 Euro.

 Here's the bodice after some sewing. The curves were difficult to sew, but clipping the curves with scissors helped. Basically, you make little cuts in the seam allowance, which helps the fabric stretch enough to be sewn in a curve.
 For this bodice, I sewed a lining and an outer layer. I created boning channels in the inner layer by cutting out rectangles of cloth, and sewing them to the wrong side of the lining. You sew in a rectangle, leaving one of the short ends open, then push in the boning and sew across the top. If you have enough seam allowance, you can fold over the seam allowance and sew down the loose side, which creates almost the same effect.

 Once the boning was in, the bodice could be sewn together. The bottom part and the back side edges were machine sewn. The corners and curves edges were clipped, then the bodice was turned right sides out. The top edge was hand sewn by folding the seam allowances inwards, pinning, and using tiny stitches to hold everything in place. I did use a little machine stitching on the centre front, because you can see machine stitching there in the actual costume.
The next steps are the sleeves and the eyelets. The eyelets are on their way (I ordered black eyelets that would blend better with the dark blue velvet). I have no ideas how to begin the sleeves. I've also been wondering how to make her necklace: any thoughts?