Showing posts with label tutorial. Show all posts

Thursday, April 20, 2017

Chie Satonaka Jacket Walkthrough


So I recently fell in love with Persona 4 (the anime; I sadly don't have time to play the game. This is the price of vet school). Chie and Kanji are probably my favourite characters. I decided that it would be fun to make Chie's costume. A lot of my costumes are quite elaborate, and I wanted a simple, comfy costume in my collection. 
I also decided to try to use recycled materials where possible. 

To this end, I went to several thrift shops to look for ideal materials to make Chie's jacket.  I settled on a men's sweater, and these two t-shirts. The sweater forms the base of the jacket, and the t-shirts are for trim and other little details. 
I thought I'd share my process with you, so here we go!

The Jacket
1) Planning: Before you pick up your scissors, study the objects you've bought, and see how you can piece them together to make your costume. I had a plan in mind before I bought my materials, but it's good to adjust your plan once you actually buy your materials. The sweater I bought had a v-neck, and was very loose, so I knew that I'd need to take it in and remove the v-neck. I also knew that I would need to remove the sleeves to add the stripes and change the cuffs.
2) Deconstruction: Once you've had a good think and decided on your plan of action, you can start deconstructing your pieces as needed. I cut off the sleeves, and removed the cuffs. I put the sweater on a dress for (though if you have a friend to help you, you probably don't need a dress form), and took in the sweater, pinching and pinning the excess fabric. I measured and checked that my line was even, and I slowly cut away the extra material.  
3) I decided to use the extra material to make the collar. In hindsight, I should have waited until I had more extra material, because my collar was a little short. 
i. Take you excess material (cut from the front of the sweater in my case) and lay it out
ii. Cut out strips of material. I made mine 2.5cm wide (+seam allowance).
iii. Sew them together. I used a sewing machine and used a small zigzag stitch. Sew lots of these pieces together: it's better to have too many and to cut the collar to size later. 
iv. Once you've got a nice big piece, measure  and cut another piece of material that is the same width and length as your sewn-together strip. I used the green t-shirt material: it will be hidden when the jacket is done so it doesn't matter too much.
v. Turn your tube of material right side out: you now have the basic collar done. 

4) Before I attached the collar, I decided to create the light green design on the front of the jacket. I used masking tape and chalk to map out the position of the patch. Once it looked right, I carefully peeled off the masking tape and stuck it to some paper to make a template. I added seam allowance and copied it on to my fabric. I also drew the template on to the jacket and cut out that material (leave seam allowances!). I used my overlock machine to sew on the light green fabric, but a sewing machine would work just as well. 
5) The Collar: I pinned on the collar and sewed it on. You can use a zigzag stitch or an overlock for this part. 

6) Time for bias tape. To make this, I drew lines at 45 degree on the yellow t-shirt fabric. I cut long strips. Make them a little bit wide, just in case. Then I fold over the edges and ironed them over. Ta da, bias tape!

7) Now let's sew on the bias tape. It will be used as trim for the front of the jacket and on the sleeves. Open up the bias tape, and face it right sides together with the jacket along the front edges. Pin it down and sew it on. Then I folded the bias tape over the edges, and hand stitched it down using a slip stitch. Sew up the sleeve and turn it right sides out. Once I was done, I ironed the edges to make it look crisp and neat. 
8) Sewing the bias tape on to the sleeves was a little more difficult. If I had to do this again, I would get hold of some hem tape or good fabric glue and stick the tape down first to stop it from sliding about. Firstly, I found the centre of the sleeves, and marked out where I wanted to put the yellow stripes, using chalk and a long rules. I then pinned the stripes in places and carefully sewed along the edges of each stripe. Once the stripes were sewn on, I sewed on the cuffs.
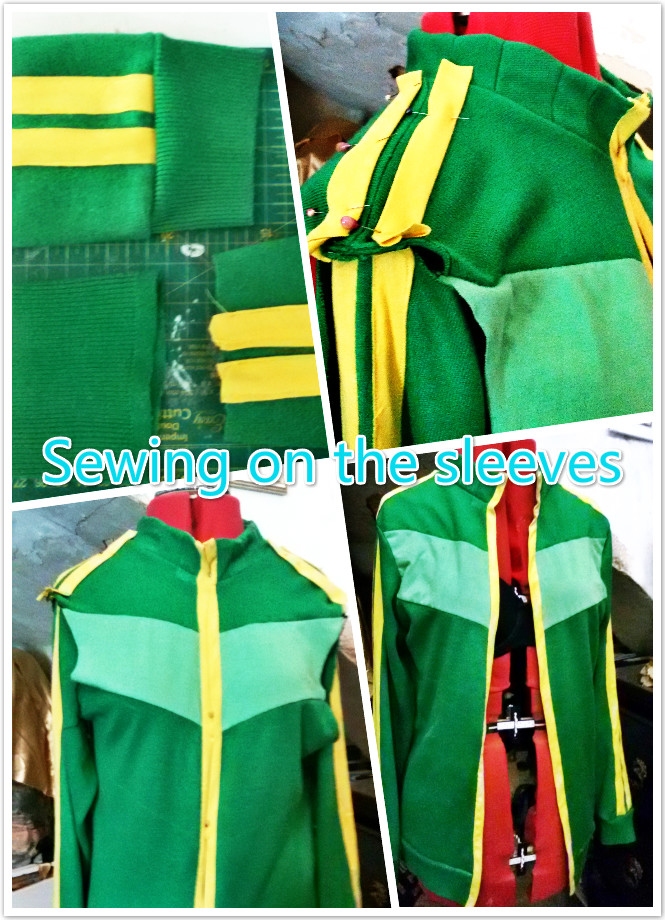
 9) The stripes on Chie's jacket also extend to the shoulders. To help measure out their position, I pinned the sleeve to the arm-scye, then pinned the bias tape on to the shoulder. You can get an idea of how well the stripes match up by pinning the rest of the sleeves in place. Once you are happy with how it looks, you can pin on the sleeve properly and sew it on. The seams may be a bit bulky, so go slowly as you sew.

10) The jacket is almost done. The only thing left is to add the zip. This took some time for me, as I had difficulty getting both sides to match perfectly. Take your time with this. Baste or pin the zip in place. Once everything looks good, carefully sew on the zip. I had to seam rip one section of the zip because the alignment was off. The zip was also a little too short, so I added a velcro closure to the collar. 


Congrats, you've finished your jacket. 

Sunday, June 19, 2016

Luna Lovegood and the End of Finals

Finals . . . are . .  . done! I've passed the first year of vet school. Only 4.5 years left (sob)

Actually found on the door of an exam room/office.
The moment I got my chemistry mark (last exam), I started work on some summer projects. I can't sew anything until I get home from Budapest, but i can start designing. 

One is a galaxy-print dress. I've been wanting to make one for a while. I want to make it from recycled materials, so I'm not sure if I  can achieve the full skirt, though the black underskirt will help with volume. 
 Another project is a Luna Lovegood inspired dress. I made Luna's Spectrespecs and thought I'd expand it into a simple costume (my university friends and I are planning a Harry Potter group for Halloween We've got a Ron, Hermione, Ginny, and Hagrid. There's some debate if I should be Malfoy or Luna though :P). 

SpectraSpecs Tutorial!

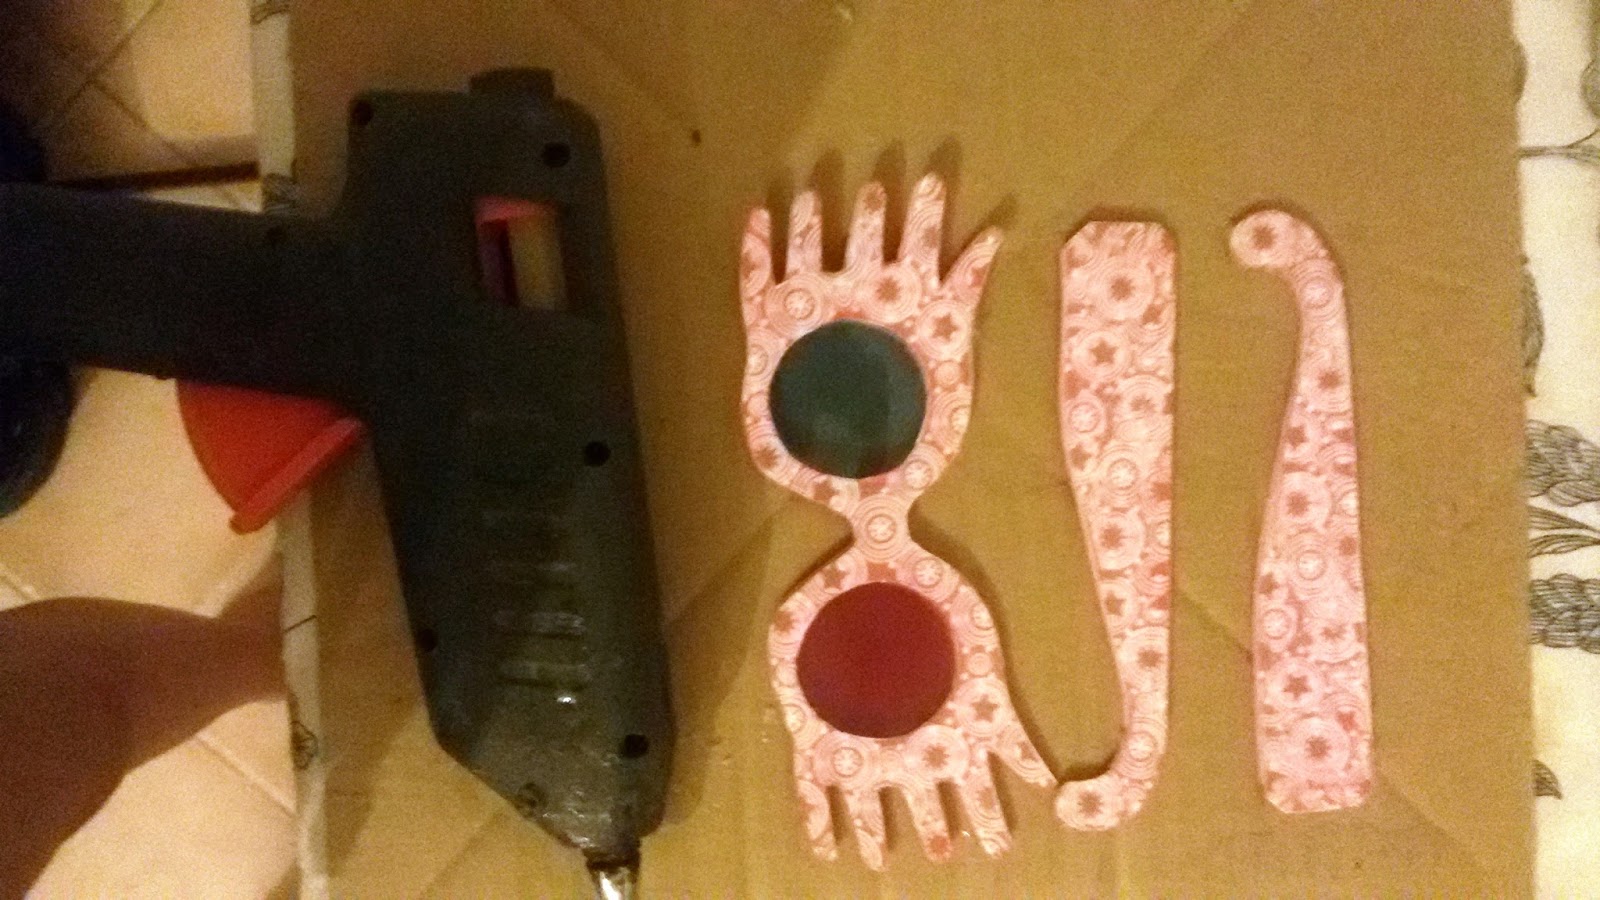
 Here are the Spectrespecs and the fabric. The Spectrespecs are made from paper, card, craft foam, plastic, cellotape, and a lot of glue. 
 1) Start out by printing the template: http://0.tqn.com/d/diyfashion/1/S/n/K/-/-/spectrespecs_large.jpg 
This is the one that I used. Glue it to a piece of card.

2) Next, cover the printed Specs with sticky-back plastic, contact paper, or strips of transparent packing tape. This helps to protect the surface and make it shiny. Cut it out
 3) Use the cardboard cut out to trace the pattern on to craft foam. When cutting the foam, cut a little inside the lines so that the foam isn't bigger than the outside of the Specs. This is also a good time to cut out the lenses. Use the lens holes on the specs to help you trace a circle, but make the plastic circle a little bigger than the lens hole: this will help you to glue it in. I cut circles from a Fanta bottle (blue Fanta = elderflower. Hungary loves elderflower. And rosehips.) and a laundry detergent bottle (surprisingly hard to find red plastic bottles that are also transparent). You could use cellophane to get a similar effect.
Cut out the plastic.
 4) If you want to reinforce the Specs' arms with foam, cut off the little piece at the end. This will make it easier to bend the arms. 

5) Glue in the lenses with a strong glue. I used hot glue.

6) Glue foam on to the back of the card pieces.

  7) Next, the arms. Score the line of the tab and fold it. Decide how you will position the arms on the main part of the specs. Make sure you'll be able to fold and open the glasses. Glue down the tabs with a strong glue.
 9) Ta da. Finished spectrespecs.

I didn't want to make an exact replica of any of Luna's costumes from the films. Instead I thought I'd try an original design. I found a pair of satin pyjamas with a lovely print: dark blue background with gold/yellow stars. I thought that would be perfect for Luna's personality. The colours are also quite reminiscent of Ravenclaw. I painted a few designs (sorry for the camera quality: my phone was not cooperating), and I'm trying to decide which is the most "Luna" like. Feel free to make suggestions on which design is best for Luna. 

1. Empire line, with gold netting ruffle
2. Empire line, with gold trim, and ruffle
3. Darted bodice, with gold netting ruffle and gold straps
4. Darted bodice, with ruffle on hem and gold trim
5. Empire line, with simple sleeves

Thursday, February 12, 2015

Sakizo's Juliet Part 2: Masquerade Mask

More Sakizo progress. i wanted a break from sewing, so I started working on the mask. I had to do this twice,because I messed up my first attempt.
 This is my base mask. The original idea was to cover it with a non stick substance and layer paper mache over it, then pull it off. This would make a copy of the mask.
 So I covered it with chocolate wrappers and layers of loo roll and glue.
 And it looked hideous. I don't think loo roll is a good medium for this kind of paper mache, because it looks hideous, like burnt skin. Luckily I still had the base mask, so I decided to use that instead.
I cut the eyes to make them the right shape, refreshed the coat of white paint, then began adding the purple paint on the right side of the mask. I used a sponge to paint the gradient, and used brushes to touch up the edges.
 I used brushes to add more details, such as the gold details and purple swirl shapes.
I dried the paint with a hair dryer, then moved on to the left side. I mixed gold and white to make the parchment colour, and dabbed it on. I used markers to draw the lines of the music sheet, then I used a bit of white paint to fade the lines and make them less harsh. I used a sepia marker to draw the music notes. 
I needed to add braid/lace on the edges, and a stick to support the mask. 
 I used E6000 to stick the lace and braid on. I had just enough gold braid, and more than enough lace. It's not exactly like to artwork because I have no Venice lace, but I think it looks pretty.

The next step was to add a stick and some roses to the sides of the mask. The roses were easy to make. You take a strip of poly-satin (or similar), and burn the edges to seal it. Then you roll and fold and twist it until you have a rose shape, and sew or glue it in place. I made 5 fabric roses and glued them to the sides of the mask. i also added some rhinestones to the petals.
The stick was made from an old paintbrush. I removed the metal and bristles, and sanded and primed the stick with acrylic paint. I used hot glue to add some details to the stick, then sprayed it gold. I made a hole in the chin of the mask, and hot glued the stick in there.


Sunday, May 4, 2014

Walkthrough: Daenerys Targaryen

Medieval Mdina happened this weekend, and I (typically) decided to go at the very last minute on Friday evening. And then I decided to also go in costume. But what costume? I've sold Merida, the only really Medieval costume I had, so what could I make in 24 hours?
And then I remembered:
I have had most of the materials to make Daenerys' costume since January. The only thing I didn't have was a pair of good boots, but Uggs would just have to do. didn't have the leggings either - oh well. So I spent Saturday sewing like crazy to create this costume:
Not bad for a day's work/ The wig was already styled, which saved me some time. I used a video tutorial from Threadbanger:

I highly recommend this video if you want to sew Daenerys' Dothraki clothing. I did make a few changes: I tended to sew instead of using hot glue, and I added bra cups to the inside of the top, to give it padding and structure. I put an old bra on the dress form, and put the crop top over it, then pinned the bra and top together. Once I got them positioned correctly, I sewed the bra to the top by hand, though I think hot glue would have been faster.
My dress form: not the prettiest, but very useful. The top is just a square of material, folded in half to make a triangle. It knots closed at the back, and there a plaited trim/neck tie and a gathered sweetheart neckline. I did a little bit of distressing, which just involved making little cuts with my scissors and pulling at the loose threads. 
I didn't take many progress pictures because I was working flat out. The skirt, loin cloth and over skirt (or whatever the lighter coloured piece round the waist is) are made exactly the way they are in the video. The material looks great, even if the colour isn't quite perfect. 

I think the wig needs work though. It was very hard to hide my hair under the wig, and dark hairs kept peeking out. There has to be a way of hiding them! I had to plait sections of the fringe, which may be a reason why some of the hair at the front is visible. Thee was also visible hair near the ears. I was thinking of using this wig for Elsa, but I might have to reconsider, or at least alter the wig significantly.


 And then it was off to Medieval Mdina! And I scored in terms of photos, because the Herpetological Society had a tent there, and were showing off their great collection of snakes, lizards and one red-kneed tarantula. I actually got to hold a Bearded Dragon: Mother of Dragons for the win!
There was also this gorgeous yellow-morph Burmese Python; she weighed about 7 kilos, but was very pleasant to hold. Snakes feels gorgeous: mostly smooth and sleek, with slight bumpiness when the scales are, and surprisingly soft. The Herpetological Society were all very friendly and helpful, and let me hold a lot of animals (3 or 4 different snakes, the bearded dragon, and a red-kneed tarantula) and answered my million and one questions. If you're in Malta and come across one of their events, I recommend saying hello-you may just get to have a 7 kilo python round your neck. 
This was a very lucky photograph. There were two mounted re-enactors, and they let me take a photograph with this Lipizzaner (I think that's the breed. The spell-check doesn't think this is a real word, and is suggested 'Pizzeria'-weird). They also had a stunning Friesian that I very much wanted to take home and keep in the garden.


Saturday, November 23, 2013

Tutorial: Harley Quinn Corset

This is a really brief tutorial for a corset I made for a client, based on Harley Quinn.

1. The first step is to draft a pattern. I used Kellax Production's tutorial, though Foundations Revealed has a very good tutorial; or you could just use a pre-existing pattern.

2 Trace your pattern on to your outside fabric (I used satin) and to your strength fabric. The strength fabric should be something with little to no stretch, like cotton twill or coutil. You should also have a lining material: I used some Batman print cotton drill :)
My method for tracing involves just drawing around the paper pattern pieces with tailor's chalk.
Here's the strength layer
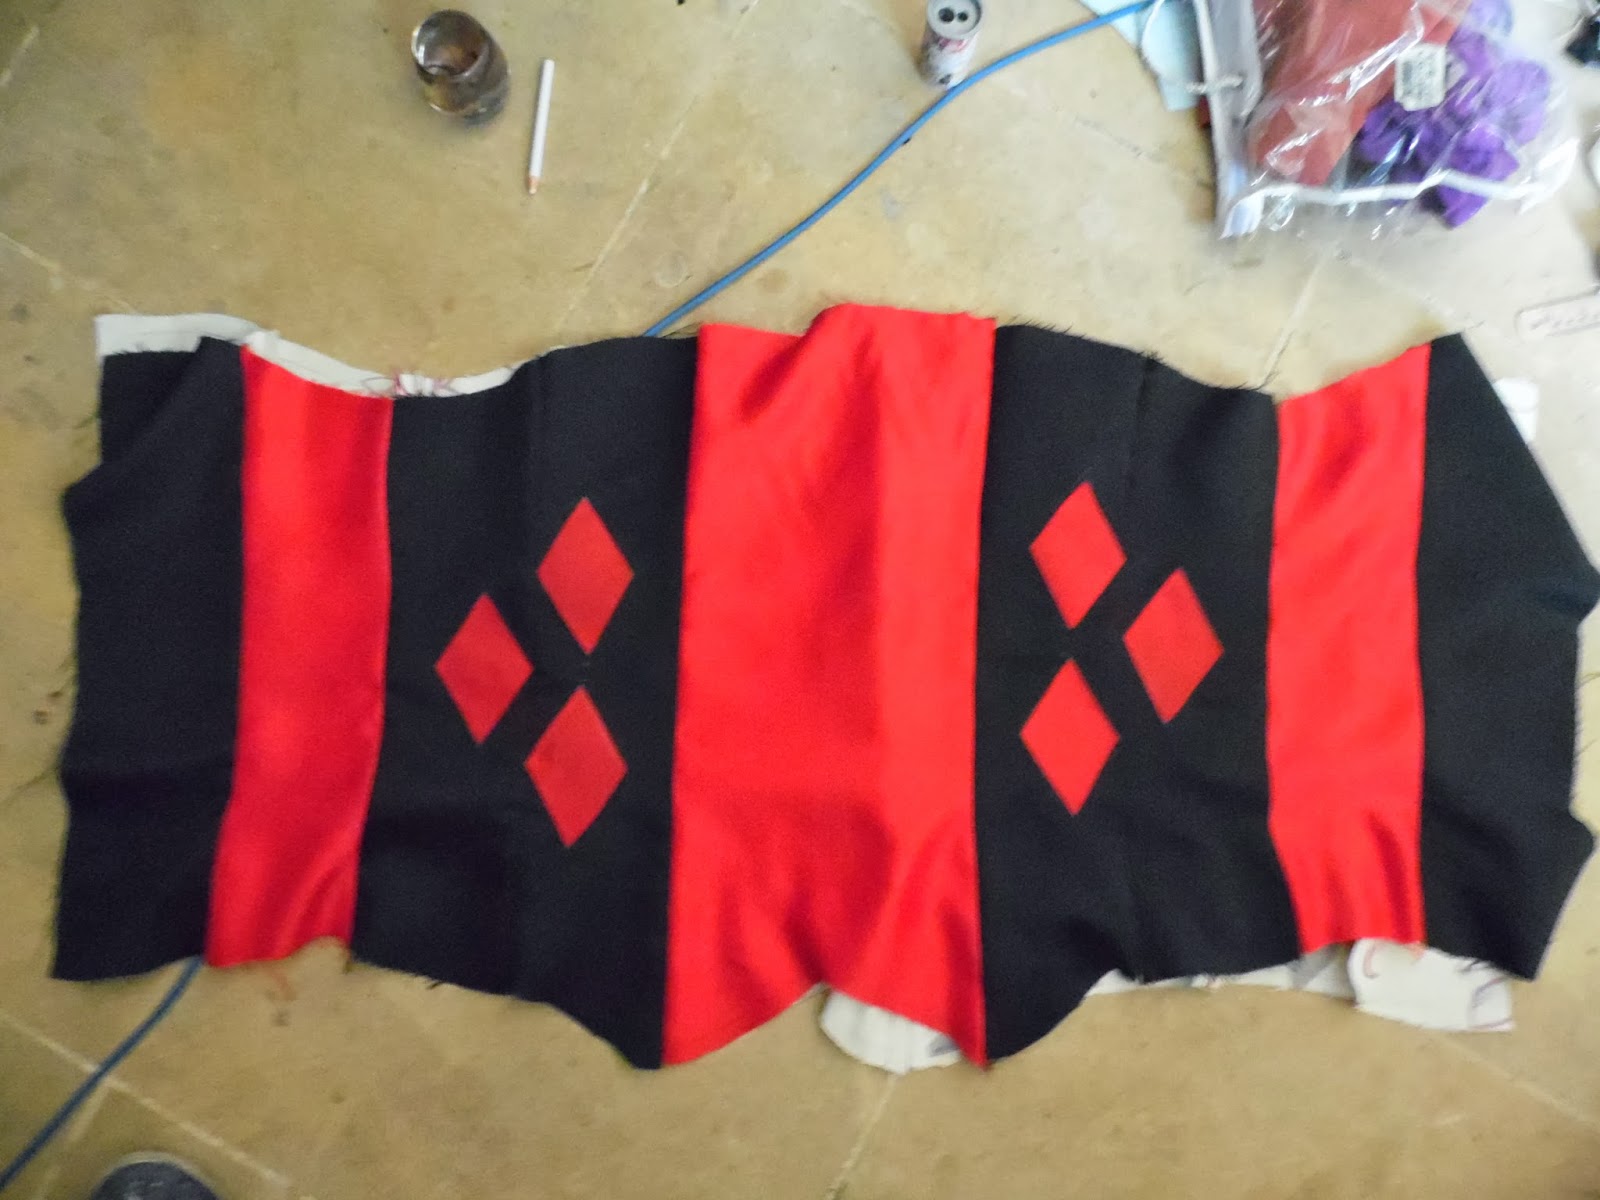
And here's the pretty layer. For the pretty layer, the black and red panels alternate, though if you want a more classical Harley look, have half of the corset black, and half red.
3. Sew the panels together for your lining and strength layer! This is tedious: you need to pin each piece together, using very many pins to keep everything in place, and sew them together. Press you seam allowances
4. Sew the satin pieces together.
This is what it should look like.
6. Next, the diamonds. My diamonds are red satin. Just draw a diamond on paper, and use it as a template. Trace around it on red satin. 
To attach the diamonds to the corset, use heat and bond or a similar product. You iron it on to the back of your diamonds (very carefully: you do not want it to stick to the iron - that would not be good), and then carefully peel off the paper backing. Once the paper backing is off, gently iron the diamonds to the front of the corset. 
Be very careful when ironing satin, especially if its synthetic. I accidentally melted a piece of satin because I was stupid and used the high heat setting. Use low heat, or use a pressing cloth, or both

7. Satin stitch time. A satin stitch is a very narrow zig zag stitch. 
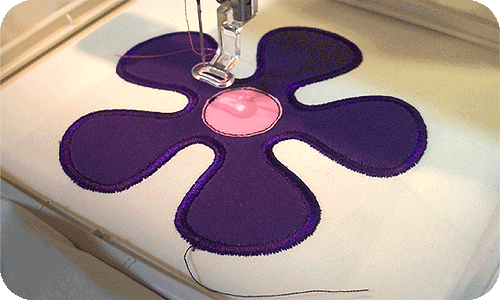
These two pictures show you what a satin stitch looks like. I prefer to add a satin stitch to anything I iron on with heat and bond. It seems more secure, and helps to prevent fraying. It also looks much neater
So, using red thread, sew around each diamond with a narrow zig zag stitch. Knot the ends of the thread to make everything secure, then cut off the excess thread.

8. Before you do anything else, you need to add bones to the corset. Corset bones are thin pieces of plastic or spring steel that give the corset shape. This corset is not designed for waist training, so I used plastic boning.
The bones rest in channels between your lining and strength layer. 
I placed a length of boning at each seam. I pinned the lining and strength layer together (wrong sides together), and sewed a narrow channel along each seam.

9. Put the lining and outer material right sides together, and pin along the seam allowance. Then sew, using a straight stitch, along the STRAIGHT edges, where the laces will be, then turn it right side out. 

10. Baste the lining and outer material together along the top and bottom edges of the corset.

11. Time to add bias tape.
http://www.coletterie.com/tutorials-tips-tricks/facing-or-detail-bias-binding
The bias tape will hide the raw edge. To apply, open the tape up and face it right sides with the corset. Pin and sew the TOP FOLD of the bias tape. Carefully fold it over so that all raw edges are hidden, and sew it down. You can use a sewing machine, but some people prefer to sew it down by hand, using a blind hem stitch. This will be invisible from the outside.


12. Laces: Mark out where you want the holes to be: an inch (2.5cm) apart is a good distance. Using a tailor's awl or similar, make a small hole and insert your grommet. With most grommets, you put the larger piece into the hole on one side, slide the washer on from the other side, and use a mallet and die to knock the two together

When all the grommets are done, add laces. Since this is an overbust corset, you'll need about 5-8 metres of ribbon or lacing (a lot, I know, but it makes it easier to tighten the corset)

And you're done :)
NB: I made two versions of this corset. The one pictured here used satin that had fusible interfacing ironed on to the back of the fabric. This makes the satin less slippery and easier to work with, but can make the cloth look a little like crumpled paper. I recommend using a sturdier material for your corset.